The initialization of TRHX channels are performed in this TAB. This TAB
itself consists of three individual TABs. The initialization of
the Temperature/Humidity Channels, DAC (for the Power of the Peltier)
and DIO (for the Polarity of the Power) channels are done in
the Setting Tab. The Online
Monitoring of the channels are done in the
Monitoring Tab and the distribution
of the Temperature and Humidity channels with time are visualized in
the Plotting Tab.
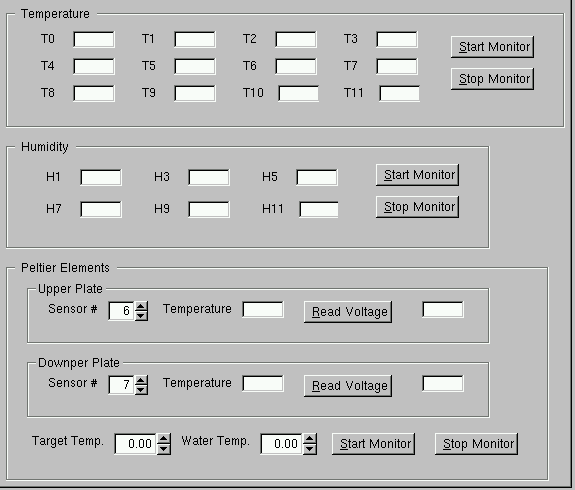
Initialization :
The Device number should be specified first in the
relevant place.
The Temperature channels should be requested (depending on the
setup of the individual labs) using the
"Request" button. A total of
12 channels can be requested (as in the TRHX box) and the numbering
is done from 0 to 11. A channel can be specified as
"Humidity" channel
using the "Check Button". If exists,
a Humidity channel is always Odd Numbers between 0 to 11.
The DAC channels should be requested using the
"Request" button. One
has to specify the connection of the DAC Channel with Peltier
elements which should be selected from the
"Combo Box" menu
"Select Peltier". This
connection is setup specific! In the "Cooling Box Power Supply"
from Vienna the "Output A" corresponds to DAC Channel #0 and
"Output B" corresponds to DAC Channel #1.
One DIO channel should be requested using the corresponding
"Request" button.
Monitoring :
The monitoring of the Temperature and Humidity sensors
(already requested) is started using
"Start Monitor" button.
There are text fields corresponding to each Temperature
and Humidity channels which are updated accordingly as they
are initialized. The updating frequency can be specified
in the "Time Interval (in Sec)"
entry. The histograms corresponding to each sensor is filled
at the same frequency once the monitoring is started. The
monitor can be stopped using
"Stop Monitor" button.
To start a cooling cycle one needs to specify the Temperature
sensor numbers associated to top and bottom Peltier elements
respectively in the "Peltier"
fields first. (The default Temperature sensor numbers are 6, 7. One
should check carefully the connection of Temperature sensors
between the Vienna Box and TRHX_Base unit for the particular
setup in the Laboratory) Then the
"Target Temperature" and the
"Water Temperature"
should be specified in the corresponding fields. After that clicking
"Start Cooling" will start
the cycle. During the cycle the Temperatures of top and bottom Peltier
elements are updated automatically in the corresponding fields.
To read the voltages one should use
"Read Voltage" buttons. One should
remember that the histograms corresponding to the sensors are
NOT initialised and filled unless one starts the monitoring.
The histograms can be saved using
"Save Root File " button in
the "Control Tab".
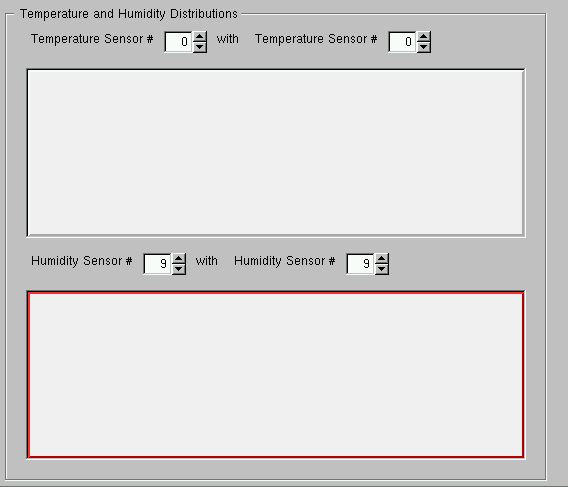
Plotting :
There are two "Canvases" for the
the Temperature and Humidity distributions as a function of time.
One should specify the Temperature and Humidity Sensor numbers. Two
sensors at a time can be viewed.